Contents
Setting
Most multiplayer online games (especially the massively multiplayer ones) follow a server-client architecture. Each player runs a piece of software called the client, responsible for displaying the game and handling the player’s input, and each client exchanges data with a central, authoritative server, that validates the actions of the players and broadcasts them to the other clients.
In our case, the client is written in Javascript with Phaser and runs in the browser of the players. This tutorial assumes basic familiarity with Phaser (game states and their associated functions, handling input, …).
The server is written in Javascript as well, using Node.js and the Express module. The client and the server communicate by using Socket.io.
The assets used for this demo are on the GitHub repository. The map is a small fraction of the map of Mozilla’s BrowserQuest. The tileset and the player sprite have been borrowed from BrowserQuest as well.
Setting up the client and the server
In this first part, we will program a basic Node.js server to serve the files to the client. We will also set the basic game files up. This part can be skipped if you are familiar with Node.js/Express and Phaser, although it might be useful to have a look at the code to get a feeling of how it is organized. I will briefly explain what this part of the code does, without entering in too many details as the focus of this tutorial is the game logic. If this is unclear, try to have a look at the relevant documentation or feel free to ask for clarifications in the comments section, I’ll be happy to clarify.
The server
We start by requiring all the Node.js modules that we will need. Note that they need to be installed in whatever environment you use (along with Node.js itself of course); you can do so using npm (e.g. `npm install express`). If you run the code from GitHub, running `npm install` will read the package.json file and install all necessary modules.
var express = require('express');
var app = express();
var server = require('http').Server(app);
var io = require('socket.io').listen(server);
Express is the module that we will use to serve files to the clients. We create a new instance called app, and by combining it to the http module, we ensure that our express app will act as an http server. Finally, we require the socket.io module and make it listen to the connections to that server. This is more or less boilerplate code to get started with simple apps.
The next step is to deliver the files depending on the path requested.
app.use('/css',express.static(__dirname + '/css'));
app.use('/js',express.static(__dirname + '/js'));
app.use('/assets',express.static(__dirname + '/assets'));

app.get('/',function(req,res){
    res.sendFile(__dirname+'/index.html');
});
These lines are necessary to be able to serve static files such as CSS style sheets or game assets that won’t be accessible directly but need to be accessed by your game. For convenience, the second argument of app.use() lets you specify virtual paths, that are not the real paths to your resources, but that will be the paths used by your scripts to access them.
We finish setting the server up by indicating which port the server should listen to and by specifying what file to serve as the root page.
app.get('/',function(req,res){
    res.sendFile(__dirname+'/index.html');
});

server.listen(8081,function(){ // Listens to port 8081
    console.log('Listening on '+server.address().port);
});
The client
Index.html is the gateway page that will be displayed when connecting to your server, and also in this case the page on which the game will be displayed. It is up to you to structure it however you please, but it should at least contain a div element with id ‘game‘. It should also include the Javascript files needed for your game, including socket.io. Here is how to include it:
<script src="/socket.io/socket.io.js"></script>
This works because the virtual path /socket.io/socket.io.js is automatically created when installing socket.io.
At this point, if you run the server (by typing `node server.js` in a terminal) and navigate to your app (e.g. at http://localhost:8081/ if you are running it locally and kept the default port), you should see your index.html served to you, with whatever content you have put in it a this point (maybe a “Hello World”, to make sure it works). Let’s now include game.js to set up the game. I’ll refer to this process henceforth as “running the game”.
We can now proceed by setting up the game canvas (assuming we have a div block with id ‘game‘) and declaring a single game state, called ‘Game‘, corresponding to a Javascript object of the same name.
var game = new Phaser.Game(16*32, 600, Phaser.AUTO, document.getElementById('game'));
game.state.add('Game',Game);
game.state.start('Game');
var Game = {};
In Game.init(), there is only one parameter to set:
Game.init = function(){
    game.stage.disableVisibilityChange = true;
};
This is not mandatory, but useful, as it will make the game keep reacting to messages from the server even when the game window doesn’t have focus (which is a desired behavior for most games).
In Game.preload(), we load the assets that we will need, including the tilemap in JSON format (exported from Tiled). I will not go into much details here about creating and dealing with Tiled tilemaps, but if you’d like me to make a tutorial to cover these aspects, don’t hesitate to let me know.
Game.preload = function() {
    game.load.tilemap('map', 'assets/map/example_map.json', null, Phaser.Tilemap.TILED_JSON);
    game.load.spritesheet('tileset', 'assets/map/tilesheet.png',32,32);
    game.load.image('sprite','assets/sprites/sprite.png'); // this will be the sprite of the players
};
In Game.create(), we start by creating and displaying our map.
Game.create = function(){
    var map = game.add.tilemap('map');
    map.addTilesetImage('tilesheet', 'tileset'); // tilesheet is the key of the tileset in map's JSON file
    var layer;
    for(var i = 0; i < map.layers.length; i++) {
        layer = map.createLayer(i);
    }
    layer.inputEnabled = true; // Allows clicking on the map
};
Notice that although clicks are enabled on the map, there is no code at the moment to deal with it; this will come once the server is up and running and the communication between client and server is working.
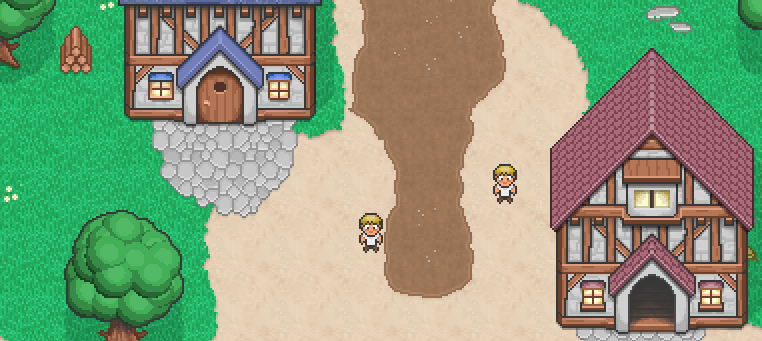
At this point, when running the game, you should see the map displayed, without anything else happening:
In index.html, include a new Javascript file, client.js, which will contain a Client object that will act as the interface between the server and the game itself.
var Client = {};
Client.socket = io.connect();
The important bit here is the second line, where we initiate a connection to the server (localhost if you don't specify otherwise between the parentheses). Each time a player navigates to your app, a connection will be established with the server. This will create a socket. Sockets are endpoints in the communication flow between the server and the client. With socket.io, we can send and receive messages through the socket, which constitutes the basic way that the client and the server will interact. Here, the socket of the client is stored in Client.socket for future use.
Real-time interactions
Now the interesting part begins. We need to make the server aware of what the players do, as well as make the clients react to messages coming from the server. When a player performs an action (connecting, disconnecting or moving), we will use the Socket.io API to send a message to the server to notify it of this action. In return, the server will use the same API to send messages to the clients when they need to be informed of the action of another player. The rest of this tutorial illustrates how to send and receive such messages and how to integrate it with a Phaser game.
Displaying the connected players
When a new player connects, a new sprite should appear in the game for all connected players, including the newly connected one. The coordinates of the sprites are determined at random by the server.
First, let's modify Game.create() in game.js so that the client will notify the server that a new player should be created. To that end, we add Client.askNewPlayer(); at the end of Game.create(). At the beginning, we also add Game.playerMap = {}; : this empty object will be useful later on to keep track of players.
Game.create = function(){
    Game.playerMap = {};
    var map = game.add.tilemap('map');
    map.addTilesetImage('tilesheet', 'tileset'); // tilesheet is the key of the tileset in map's JSON file
    var layer;
    for(var i = 0; i < map.layers.length; i++) {
        layer = map.createLayer(i);
    }
    layer.inputEnabled = true; // Allows clicking on the map
    Client.askNewPlayer();
};Now in client.js, we need to define the method Client.askNewPlayer():
Client.askNewPlayer = function(){
    Client.socket.emit('newplayer');
};
This method will use our socket object, and send through it a message to the server. This message will have the label 'newplayer', which is self-explanatory. A second argument could be added to pass additional data, but it won't be needed in this case.
In server.js, we need to react to messages from the client. Add the following code:
server.lastPlayderID = 0; // Keep track of the last id assigned to a new player

io.on('connection',function(socket){
    socket.on('newplayer',function(){
        socket.player = {
            id: server.lastPlayderID++,
            x: randomInt(100,400),
            y: randomInt(100,400)
        };
        socket.emit('allplayers',getAllPlayers());
        socket.broadcast.emit('newplayer',socket.player);
    });
});

function getAllPlayers(){
    var players = [];
    Object.keys(io.sockets.connected).forEach(function(socketID){
        var player = io.sockets.connected[socketID].player;
        if(player) players.push(player);
    });
    return players;
}

function randomInt (low, high) {
    return Math.floor(Math.random() * (high - low) + low);
}
We tell Socket.io to listen to the 'connection' event, which is fired each time a client connects to the server (using io.connect()). When this happens, it should call the callback specified as the second argument. This callback receives as first argument the socket used to establish the connection, which, just like the client socket, can be used to pass messages.
Using the socket.on() method from the socket objects, it is possible to specify callbacks to handle different messages. Therefore, each time a specific client sends a specific message through his socket, a specific callback will be called in reaction. In this case, we define a callback to react to the 'newplayer' message. Let's decompose what is done there:
socket.on('newplayer',function(){
        socket.player = {
            id: server.lastPlayderID++,
            x: randomInt(100,400),
            y: randomInt(100,400)
        };
        socket.emit('allplayers',getAllPlayers());
        socket.broadcast.emit('newplayer',socket.player);
    });
First, we create a new custom object, used to represent a player, and store it in the socket object. As you can see, it's possible to add arbitrary client-specific properties to the socket object, making them convenient to access. In this object, we give the player a unique id (that will be used on the client side), and we randomly determine the position of the sprite. Then, we want to send to the new player the list of already connected players:
socket.emit('allplayers',getAllPlayers());Socket.emit() sends a message to one specific socket. Here, we send to the newly connected client a message labeled 'allplayers', and as a second argument, the output of Client.getAllPlayers() which will be an array of the currently connected players. This allows newly connected players to get up to date with the amount and positions of the already connected players. Let's have a quick look at Client.getAllPlayers():
function getAllPlayers(){
    var players = [];
    Object.keys(io.sockets.connected).forEach(function(socketID){
        var player = io.sockets.connected[socketID].player;
        if(player) players.push(player);
    });
    return players;
}
io.sockets.connected is a Socket.io internal array of the sockets currently connected to the server. We can use it to iterate over all sockets, get the player property we have added to them (if any), and push them to a list, effectively listing the connected players. And finally:
socket.broadcast.emit('newplayer',socket.player);The socket.emit.broadcast() sends a message to all connected sockets, except the socket who triggered the callback. It allows to broadcast events from a client to all other clients without echoing them back to the initiating client. Here, we broadcast the 'newplayer' message, and send as data the new player object.
To summarize what we've done in these last few steps:
- We listen to connections from clients and define callbacks to process the messages sent through the sockets
- When we receive the 'newplayer' message from a client, we create a small player object that we store in the socket of the client
- To the new client, we send a list of all the other players, so that he can display them
- To the other clients, we send the information about the newcomer
So far, our server reacts to one message from the clients. We now need to adapt the clients so they can process the 'allplayers' and 'newplayer' messages from the server in return, thus completing the loop `connect - notify the server I'm here - get info in return - display it`. Note that the 'newplayer' message sent by the client and the one sent by the server are not the same; I chose to give them the same label because they convey the same kind of information, but they will be treated separately since they have different endpoints (the server for the former, the client for the latter).
In client.js, add this code:
Client.socket.on('newplayer',function(data){
    Game.addNewPlayer(data.id,data.x,data.y);
});

Client.socket.on('allplayers',function(data){
    console.log(data);
    for(var i = 0; i < data.length; i++){
        Game.addNewPlayer(data[i].id,data[i].x,data[i].y);
    }
});
As you can see, the same syntax to handle messages can be used on the client side. When data is sent along a message, it can be retrieved as the first argument of the callback on the receiving end. Therefore, the 'data' object fed to the 'newplayer' callback corresponds to the socket.player data sent by the server. For the 'allplayers' message, it is a list of socket.player objects. In both cases, this data is processed by calling Game.addNewPlayer(), which we can now define in game.js:
Game.addNewPlayer = function(id,x,y){
    Game.playerMap[id] = game.add.sprite(x,y,'sprite');
};
This method creates a new sprite at the specified coordinates, and stores the corresponding Sprite object into an associative array declared in Game.create(), with the supplied id as the key. This allows to easily access the sprite corresponding to a specific player, for example when we need to move or remove it (see below).
At this point if you restart the server (so the last modifications are taken into account) and navigate to your game, you should see a small character displayed, corresponding to your sprite. If you connect with other browsers, additional characters should pop up on the screen.

Handling disconnections
As is, when a player disconnects, his sprite will remain on the screen of the other players, which is not desirable. This can be fixed by processing the 'disconnect' message that the server automatically receives when a client actively disconnects or times out. This message can be treated just like any other, just as we did for 'newplayer' for example: by binding a callback to it within the io.on() method:
io.on('connection',function(socket){

    socket.on('newplayer',function(){
        socket.player = {
            id: server.lastPlayderID++,
            x: randomInt(100,400),
            y: randomInt(100,400)
        };
        socket.emit('allplayers',getAllPlayers());
        socket.broadcast.emit('newplayer',socket.player);

        socket.on('disconnect',function(){
            io.emit('remove',socket.player.id);
        });
    });
});
In reaction to the 'disconnect' message, we use io.emit(), which sends a message to all connected clients. We send the message 'remove', and send the id of the disconnected player to remove.
Note: Thanks to Kaundur for pointing on that the 'disconnect' callback has to be registered within the 'newplayer' callback; if not, and 'disconnect' is somehow called before 'newplayer', the server will crash!
In client.js, this is processed as follows:
Client.socket.on('remove',function(id){
    Game.removePlayer(id);
});
And in game.js:
Game.removePlayer = function(id){
    Game.playerMap[id].destroy();
    delete Game.playerMap[id];
};
This illustrated the use of the Game.playerMap data structure, by the way. No need to loop over sprites; the id allows you to fetch it immediately. Now all that remains to do is process and broadcast player movements.
Handling player movements
It's time to complete Game.create(). We basically want that when the map is clicked, the coordinates are sent to the server, so that the position of the player who clicked can be updated for everyone. Add the following line to Game.create():
layer.events.onInputUp.add(Game.getCoordinates, this);Now, the map will react to clicks by calling the Game.getCoordinates() method, which we can define as follows:
Game.getCoordinates = function(layer,pointer){
    Client.sendClick(pointer.worldX,pointer.worldY);
};
Callback of onInputUp events in Phaser receive as second argument the corresponding pointer object, which contains two properties worldX and worldY that we can use to know where, on the game map, did the click take place. We can then pass these coordinates to Client.sendClick() in client.js:
Client.sendClick = function(x,y){
  Client.socket.emit('click',{x:x,y:y});
};
Which simply sends the coordinates to the server, with the label 'click'. No need to send any player id, since the socket is client-specific and associated to only one player.
In server.js, here is the final list of message callbacks:
io.on('connection',function(socket){

    socket.on('newplayer',function(){
        socket.player = {
            id: server.lastPlayderID++,
            x: randomInt(100,400),
            y: randomInt(100,400)
        };
        socket.emit('allplayers',getAllPlayers());
        socket.broadcast.emit('newplayer',socket.player);

        socket.on('click',function(data){
            console.log('click to '+data.x+', '+data.y);
            socket.player.x = data.x;
            socket.player.y = data.y;
            io.emit('move',socket.player);
        });

        socket.on('disconnect',function(){
            io.emit('remove',socket.player.id);
        });
    });
});
The x and y fields of the player property of the socket are updated with the new coordinates, and then immediately broadcast to everyone so they can see the change. Now the full socket.player object is sent, because the other clients need to know the id of the player who is moving, in order to move the proper sprite on-screen (even though, in this minimalist game, there is no actual way to distinguish the players).
Back to client.js, we need to handle the 'move' message from the server, so that the clients can react to another player moving:
Client.socket.on('move',function(data){
    Game.movePlayer(data.id,data.x,data.y);
});
The process should start to become familiar to you. In game.js:
Game.movePlayer = function(id,x,y){
    var player = Game.playerMap[id];
    var distance = Phaser.Math.distance(player.x,player.y,x,y);
    var duration = distance*10;
    var tween = game.add.tween(player);
    tween.to({x:x,y:y}, duration);
    tween.start();
};
We again make use of the Game.playerMap structure to retrieve the proper sprite, and then we tween it to make the movement progressive.
Conclusion
And that's it! If you now run the game, you should be able to see the sprites move and (dis)appear according to the actions of other clients in real-time. Many improvements are possible from there, which I leave to you as exercises. To name a few:
- Animate the movements of the sprites, using a spritesheet
- Specifying "collisions", that is, areas where the players cannot move
- Use your own, bigger map and make the camera follow the player
- Allowing the players to specify a name for their character, or to change their sprite
If there is demand for it, I would be very inclined to make tutorials for these possible improvements, or others; feel free to contact me if you are interested.
If you want to learn how to deploy this example project on Heroku like I did, check out this follow-up tutorial!
For a more complex example of a multiplayer online game made with Phaser, have a look at Phaser Quest!
Related workd
For a more modern syntax, check out TVscoundrel's refactoring of the source code in ES2015!
Jerome Renaux
I'm an independent game developer, working mainly on browser-based multiplayer online game (HTML5 & Javascript). I love to discuss about all aspects of game development so don't hesitate to get in touch!
Follow Me: